2021年10月18日星期一

Launch X-431 PAD VII - 3 reasons why you should buy it

In the market for a high-end diagnostic tool?


Look no further, the Launch X-431PAD VII comes packed with fantastic features and functionalities aimed at the professional auto technician. From ADAS calibration to 32 service functions, and more, the PAD VII is a complete diagnostic solution.

Launch X-431 PAD VII


Let’s look in detail at what the device has to offer and is it really worth the hype.

Reason 1: Powerful hardware


The PAD VII is a powerful device as it boasts solid specs, enough to do whatever you throw at it. Check out the table below for the hardware specifications of this diagnostic tool.


DescriptionSpecifications
Screen13.3-inch IPS touchscreen display
Screen Resolution1920x1080
Processor2.0 GHz Octa-core
Operating SystemAndroid 9.0
RAM8GB
Storage256GB
CameraFront 8MP, Rear 13MP
Battery19,000 mAh
ConnectivityWi-Fi, Smart Link C

The Launch PAD VII has impressive hardware. With a 13.3 inch IPS touchscreen display with a 1920x1080 resolution, the device sits at the high-end of the diagnostic market. The scan tool comes with a 2.0 GHz Octa-core processor backed by 8GB of RAM, specs auto technicians would love to hear.


The operating system also complements the processing hardware. Running on Android 9.0, the device is capable of seamless and fast performance. It provides a fantastic user experience making diagnostics more user-friendly.


The OBD2 scanner comes with ample storage. Featuring a 256GB internal memory, it can simultaneously record data while you perform features and functions. The storage space is more than enough, even for an intense user like me.


What bugs many auto professionals is the small battery packs in scan tools. However, the PAD VII packs 19,000 mAh of power, enough to last you through your busy day at the garage and then more.


The device features two cameras, a front 8 MP and a rear 13 MP help users take pictures to share them with their auto technician circle for troubleshooting help if need be. It comes with a Smart Link device that connects to any vehicle’s OBD2 port and allows auto technicians to help their customers with troubleshooting remotely using the internet.

Reason 2: Supports dozens of advanced features


Besides the advanced hardware, the Launch PAD VII comes packed with all the features you would expect a high-end device to have. Check the table below to see what the device has to offer.


DescriptionFeatures
Full system diagnosticsAccess to all vehicle modules and capable of 10 basic modes
Reset functionsBrake, TPMS, oil, and SAS reset, ABS bleeding, immobilizer, and more
Bidirectional controlSupports EGR test, EVAP test, pump and valve test, and more

Full system diagnostics


The scan tool is capable of full system diagnostics. It can tap into all modules of the vehicle and read and erase fault codes. Besides DTCs, the device can perform all ten basic modes such as:

  1. VIN
  2. Live data and graphical representation
  3. Freeze frame
  4. I/M readiness
  5. And more


The topology mapping is a great feature that summarizes the diagnostic results and any system malfunctions in a visual image of the car allowing for a holistic view.


The device is also capable of remote diagnostics. Auto technicians can better serve their customers remotely (at other garages) using the Smart Link C. Technicians can send and receive messages to each other using PAD VII. It helps save time and increases work efficiency.


Besides the in-built diagnostic capabilities, users can purchase apps from their new online “mall” store and expand their range of functions or update them. You can even have the ADAS calibration feature by downloading it from the online store but for that, you would need to buy a separate calibration device from the manufacturer.

Reset functions


Replacing components and parts in a vehicle requires a quick system reset for efficient usage and the Launch PAD VII is capable of doing just that. The device can perform 32 different advanced service functions that include:

  • Service lamp reset
  • Brake reset
  • Battery reset
  • SAS reset
  • TPMS reset
  • ABS bleeding
  • And many more

Bidirectional control, programming, coding


The Launch PAD VII is capable of advanced online coding and programming functions. Users don’t need to do physical code inputs on the device but tap on the many different available online coding.


The diagnostic tool has bidirectional control for cars and commercial vehicles allowing users to conduct the following actuation tests:

  • EGR test
  • Pump and valve test
  • Acceleration device test
  • Compression test
  • Cylinder balance test
  • And more


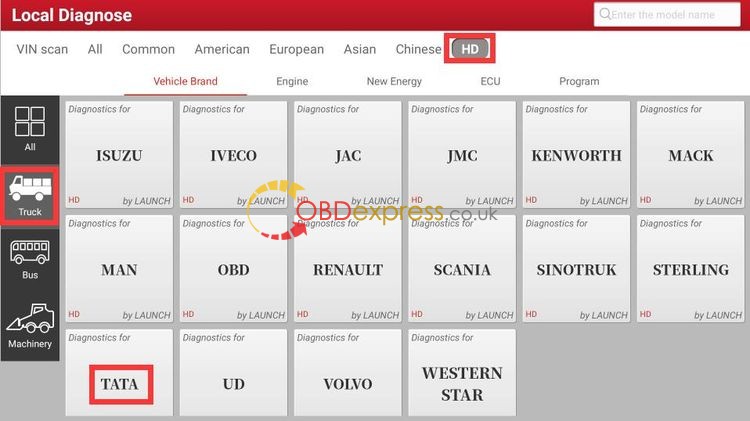
The vehicle has superb compatibility and can run on over 110 different car brands across Australian, Asian, European, USA, and the Chinese market.

Reason 3: The best version of the X-431 Pad series


The Launch PAD VIII is considered the most advanced of the X-431 series and ranks above the PAD V and PAD III v2.0 when it comes to hardware and functionalities.


Check the comparison table below to see how the PAD VII compares against its predecessors.

DescriptionPAD III v2.0PAD VPAD VII
Display/Resolution10.1-inch IPS 1900x120010.1-inch IPS 1900x120013.3-inch IPS 1920x1080
Processor2.0 GHz Octa-core2.0 GHz Octa-core2.0 GHz Octa-core
RAM2GB4GB8GB
Storage64GB64GB256GB
Battery15,000 mAh9,360 mAh19,000 mAh
Features   
Diagnosis functionsFull system diagnoses and OBD2 full functionsFull system diagnoses and OBD2 functionsFull system diagnoses and OBD2 functions
Advanced functionsBi-directional control, advanced coding, and programmingBi-directional control, advanced coding, and programmingBi-directional control, advanced coding, and programming
Smart Link remote diagnosisNoNoYes
Service functionsCapable of 21 service functions including brake, oil, SAS reset, and moreCapable of 26 service functions including windows calibration, A/F reset, and moreCapable of 32 service functions including ACC calibration, GPF regen, and more


Although all three devices have a similar chipset, the PAD VII delivers stunning performance with its 8GB RAM. The larger 13.3-inch screen, bigger 19,000 mAh battery pack, and vast 256GB of storage make this the best scan tool among the three in terms of hardware.


When it comes to functionalities, the PAD VII offers everything the other two devices are capable of and more. You’ll get a complete system diagnosis, OBD2 full functions, bi-directional control, and advanced coding but also have access to smart link remote diagnosis which the other two don’t have.


Looking at the service functions, the PAD VII again excels by providing 32 service functions covering basic needs like brake, oil, and SAS reset to high voltage battery health detection, rotation angle sensor calibration, GPF regeneration, and many more. PAD VII also comes with ADAS calibration but you would need a calibration device for it to work.


The PAD VII is the best diagnostic tool from Launch X431 able to perform all your daily diagnosis tasks and more without any hiccups.


Conclusion  


The launch has made some pretty serious devices in the past but the PAD VII tops it up with the latest chipset, large screen, bigger battery, exceptional RAM, and storage for days.


Is it worth the investment? As an auto technician, I always look for the best devices to help me better serve my clientele and the PAD VII does just that. Remote diagnosis helps connect with other technicians and save time while the fantastic compatibility is a solid plus.

Lrean more:  Launch X-431 Pad VII Review: Unboxing Quick Look

2021年7月30日星期五

Launch X431 Guide Function to Set VW Passat 2013 DSG Transmission

After replacing DSG transmission, DSG clutch pack & DSG mechatronic, the vehicle may get a fault code P175F00: transmission basic setting not perform.


How to do DSG transmission basic setting?

The procedure is taking VW Passat 2013 as an example, applies to Launch X431 PAD V, X431 PAD VII, X431 Pro V4.0, X431 Pro3 V4.0.


Having diagnosed systems for fault codes, go back to “Guided Functions”.


Fill in the vehicle basic characteristics including manufacturer, vehicle type, year, model, engine type, press “Start”.


Transmission electronics >> Guided functions >> J743 - Mechatronic, basic setting >> Continue/ complete >> Continue/ complete


Follow the instructions to operate:


Note: if the entire transmission is replaced, no basic setting is necessary.

To ensure proper communication between control modules, the installation info must be reset.

Continue/ complete >> 2. transmission basic setting >> Yes


Check Pre-Conditions:

More transmission selector lever to position P.

Apply parking brake.

Switch the engine off.

Switch the ignition on.

Press “Continue/ complete”.


Test requirements have been met.

Basic setting will continue.

Please wait the vehicle diagnostic tester automatically continues...


Basic setting active.

The basic setting is running, please wait...

Note:

During the basic setting, unusually loud gear shifting noises are noticed in the drive train.

Press “Continue/ complete”.

Start the engine...

Please wait...


The basic setting has been performed correctly.

Only when the ignition is switched off and on will the data in the mechatronic be stored.

Switch the ignition off.

Press “Continue/ complete”.


Wait for the control modules shutdown to complete.

Switch ignition on.

Note:

The basic setting is completed with the switching on of the ignition.

In the next test step a test drive for the adaptation of the adaptation values is to be performed.


Finally, let’s drive the vehicle to have a test.

It is normal, done!


Using Luanch-X431 Diagnostic Tool to perform DSG transmission basic setting after replacement is easy to be done.

Video tutorial
Launch X-431 PAD V Guided Functon on VW PASSAT 2013 DSG Transmission Basic Setting


Launch X-431 PAD V Guided Functon on VW PASSAT 2013 A/C Compressor first run


BTW , What are Launch X431 Guided Functions?

The Guided Functions are advantaged with their easy operations. A guided functions is composed of
multiple basic functions, freeing users from trouble such as looking up channel number and login code.
Every guided function has detailed operation guidance and operating condition statement. Targeted on
different car models and configurations, there are related operation guidance that provides
corresponding tips, auto log-in, matching, setting and coding. Having guided functions means having
the company of an expert who can provide idea, help looking up maintenance manual and test
functions while repairing a car. Till today, among the comprehensive diagnostic tools globally, very rare
of them support all guided functions of Volkswagen and Audi.

Launch X431 Supported Guided Functions:
Service Regeneration,Particle Filter(DPF)
Adapt Injector Correction Value
Reset Engine Control Adaptation Values
Throttle Learning
Fill Coolant Circuit
Adapt Values,SCR system
Activating/Deactivating Cruise Control System
Basic Setting Of Transmission
Basic Setting of Sensors (-G85/-G200/-G201/-G251)
Basic Setting/Bleeding Brake System
Initial A/C Compressor Run-In
Adaptation Automatic Locking At 15 km/h
Distance Control System Calibration
Deactivate Or Activate Airbags And Belt Tensioners
Adaptation Menu Key Multifunction Steering Wheel
Adapting Service Intervals
Service Interval Display,Resetting
Transport Mode, Switching Off/On
Level Control System Basic Settings
Brake Pad Change
Headlight Beam Adjustment
Battery Adaptation
Rear View Camera System Calibration
Driver Assistance Systems Front Sensor System Calibration
and so on

https://www.obd2shop.co.uk/


2021年7月29日星期四

Launch X431 PAD VII ADAS Rader Calibration of Ford F-150 2019

When the radar sensor, ACCM(Adaptive Cruise Control Module), or front bumper was replaced or it did not accord with the maintenance alignment requirements, you’ll need to do radar calibration on the vehicle.


How to use Launch X-431 PAD VII to do radar calibration?

Here we’re taking a Ford F-150 2019 as an example to show the procedure step by step.


Step1-5

(Software version: Ford V48.50 or above)

Automatically Search >> Yes >> Special Functions/ ADAS(Advanced Driver Assistance System Calibration) >> Electrical >> Cruise Control

Launch X431 PAD VII ADAS Rader Calibration of Ford F-150 2019 01


Step6 Select “CCM#1(Cruise Control Module) calibration”;


Step7 Follow the prompt to confirm the conditions that need to be met;


Step8 The scanner will prompt that a Fault Code will be generated when the ignition is switched OFF before the calibration is complete.


Step9 Drive vehicle between 50 and 80kph to perform the radar calibration. Keep driving until “Front sensor is not aligned” disappears. If the vehicle is equipped with stop/start, please manually disable before you start driving.


Step10 You’ll get a prompt that the function executed successfully.


Step11 Exit the calibration menu then clean down any fault codes.

Launch X431 PAD VII ADAS Rader Calibration of Ford F-150 2019 02

Done!


Just follow the tutorial, using X-431 PAD 7 Diagnostic Tool to perform radar calibration for vehicles will be much easier.

https://www.obd2shop.co.uk/service/f150-rader-calibration-using-launch-x431-pad-vii-and-adas.html


2020年10月27日星期二

Latest launch X431 V+ HD3 support Heavy Duty Module 1996 -2020 year

 Launch X431 V+ with one add-on HD3 Heavy Duty Module is a very cool truck diagnostic tool. Simple tablet appearance, high-tech HDIII module, high-definition touchscreen (1920*1200), faster running speed (Lenovo Tablet TB-X605FC, Android 9RAM 2G  Storage 32GB CPU Snapdragon 450 Display). It is more than a professional diagnostic tool, it owns more than 15 special functions. It can work with newest 2020 heavy duty trucks. Moreover, its vehicle software language is multilingual: English, German, French, Italy.


Launch X431 V+ & HD3

Image 1: Launch X431 V+ supports heavy duty Hino from 1996 -2020 year.

Image source: http://qcar.x431.com/newqcar/ (Launch official site)


Launch X431 V+ has a wide vehicle brand coverage: truck, bus, machinery, Engine, New Energy

1. Workable Truck List

HD_Demo, Astra, Mercedes Benz, Credo, DAF, DFL, ERF, FAW, Ford, Foton, Freightliner, Bremach, Fuso, Ashok leyland, Hino, Hyundai, International, Iris Bus, Isuzu, Iveco, JAC, JMC, Kenworth, Mack, Man, OBD, Renault, Scania, Sinotruck, Sterling, Tata, UD, Volvo, Western STAR.

Launch X431 V+ & HD3Launch X431 V+ & HD3


2. Workable Bus List

Higer, Hino, Hyundai, Irizar, Isuzu, Man, Neoplan, OBD, Renault, Setra, Sitcar, Sunlong, Sunwin, Volvo, Zhongtong.

Launch X431 V+ & HD3


3. Workable Machinery

 HD_Demo, Mercedes Benz, Caterpillar, Hino, Isuzu, OBD, Volvo.

Launch X431 V+ & HD3


4. Engine coverage

HD_Demo, Caterpillar, Chaochai, Cummins, Dachai , Detroit, OBD, Quanchai, Shangchai, WP, Xichai, Yangchai, Yuchai.

Launch X431 V+ & HD3


5. New Energy coverage:

HD_Demo, Chaochai, Cummins, OBD

ECU: ABS, Allison, Bosch, SCR, OBD

 Launch X431 V+ & HD3

Program: Allison, Chaochai,Detroit, Yangchai etc.


Launch X431 V+ optimize a new function "Camera scan VIN":

Tap "VIN scan" and you will see "Camera Scan". It equals to a Camera, with it you won't manually input the VIN and it will be 100% correct.

Launch X431 V+ & HD3Launch X431 V+ & HD3 

Launch X431 V+ & HD3


Launch X431 V+ owns powerful functions:

Let's go forward to selecting a vehicle (like Cummins), then "System Automatic", it can do: read vehicle information, read DTC, clear fault memory, read data stream, read freeze frame, actuation test, feature and parameter, advanced ECM data.

For more other vehicle's function list, please go to the above official sit to search.

Launch X431 V+ & HD3


After entering " read DTC" and have the results shown as below:

It will not only list DTC codes, but also comes with description and status. That's very convenient without searching in the Google. 

Launch X431 V+ & HD3

Launch X431 V+ & HD3


The next one option is "Feedback ". In the process of testing, if you can't test or encounter other problems, you are allowed to submit the logs in testing to the Launch server.  Then the engineers will analyze and find out the problem to help you solve it.

Launch X431 V+ HD3


6 Steps to register Launch X431 V+:

To protect your machine and data safety, also enjoy the free update, you are required to register a member for the first time.


1. Select "Login".


 Launch X431 V+ HD3

2. Select "New registration".

Launch X431 V+ HD3


3. Enter the user name & password, enter the password again. Enter the usual email address. Select the country. Enter the CAPTCHA verification code. Click "Register".

X431 V+ & HD3


4. Open the envelope in the product, enter the SN number inside, and activate the password--click ACTIVATE

Launch X431 V+  HD3


5. Congratulations! you've registered successfully, you are ready to use the machine.


 Launch X431 V+  HD3

6. Software update.

 As you can see, I selected all available newest truck software to update, just wait until it succeed. 

Launch X431 V+  HD3

Launch X431 V+  HD3


In addition, after entering "User Info", there are " Activate VCI" and "Firmware Fix", just click on them and follow the screen to do.

 Lauch X431 V+ & HD3


Alright, if you are interested in launch X431 V+ HDIII Heavy Duty Module, or have any technical issues, welcome to visit https://www.obdexpress.co.uk/


http://blog.obdexpress.co.uk/2020/10/27/launch-x431-v-hd3-firmware-update/ 

2020年10月25日星期日

X431 Pros Mini 958.2 Porsche GTS steering angle calibration: confirmed


I retrofitted the Heated Steering wheel on 2016 958.2 Porsche GTS, because I missed my heated wheel. I bought a new heated wheel and the heated wheel button so I can disassemble my current wheel and reassemble everything onto the new wheel. I am just having an issue with what exact part is needed. do I need a completely different part that isn’t the clockspring? And do I need to buy a new part or is a used one acceptable?

And then on to coding it, what exactly needs to be coded? I have a Launch X431 Pros mini that does most coding and hopefully will do whatever is needed.


I will record all what I did:

Date: 09-19-2020

I’ve done more digging and it seems it could be easier than I originally thought. At this point it looks like I only need a clockspring with the heated wheel power pins, part # 95B953568A or 95B953568C or 95B953568E from a 15-18 cayenne or Macan.

I already have the heated wheel and heated wheel switch. Once I find the clockspring and install it all I will need to do a steering angle sensor calibration and then code the steering wheel control module to accept the heated wheel.

I have a Launch X431 pros mini and confirmed last night it will do the steering angle calibration and I was able to get into the steering wheel control module to where it said heated wheel not installed. It let me change to installed, but would not write the code because it’s not yet installed hopefully.

I did also see a thread on a Macan where the person used a used clockspring and the steering wheel control module from another car with the heated wheel already coded and it worked for him, but still had to do the SAS calibration.


Date: 10-09-2020

I now have the clockspring with the heated wheel

contacts, the heated wheel switch, and the heated wheel will be here next week and I will update on the outcome!

X431 Pros Mini 958 2 Porsche Gts The Steering Angle Calibration 01

X431 Pros Mini 958 2 Porsche Gts The Steering Angle Calibration 02

Date: 10-13-2020

The wheel should be here any time now.
Last night I disconnected the battery and removed the airbag and steering wheel. The column trim came off pretty easily, once the steering wheel is off, there are two square holes behind where the steering wheel is on the lower column cover, using a small screwdriver slightly push in through those holes to release tabs and the upper cover hinges at the rear and comes off. The lower cover had two screws and some tabs inside the column cover that have to be pressed and it slides down and off. Disconnect the one plug on the power column switch. There is a foam piece screwed up to the bottom of the column with two t-20 screws, remove those and the piece comes off. Now you can get to replace the clockspring. One black connector and one yellow airbag connector on the lower backside of the switch assembly. I bought a used clockspring and switch setup, identical to mine but also included voice control and the pins for the heated wheel harness.
The new and old setup had the exact same pins on the connector.
After the two connectors are released there is one Allen bolt, I think it was a 6? I forget. And the switch assembly slides toward you. Only goes on one way, it does not turn or anything, it will always be straight. Slide the new on on until it abruptly stops, tighten Allen, plug in 2 connectors, reassemble column trim. The foam piece goes on with the two screws, make sure the harness for the column adjust is still there. Clip the lower colum trim on on the sides, and then screw in the two screws. The upper trim piece was a PITA to get back on. It doesn’t hinge down like it hinges up off. To put it back on it slides straight down into place, but as it slides down you have to make sure it aligns with the bottom of the column trim behind the stalks. Took 10 minutes fiddling to get it right.
I then disassembled steering wheel down to the metal frame and am waiting on the new wheel which should be arriving shortly.

X431 Pros Mini 958 2 Porsche Gts The Steering Angle Calibration 03

X431 Pros Mini 958 2 Porsche Gts The Steering Angle Calibration 04

X431 Pros Mini 958 2 Porsche Gts The Steering Angle Calibration 05

X431 Pros Mini 958 2 Porsche Gts The Steering Angle Calibration 06

X431 Pros Mini 958 2 Porsche Gts The Steering Angle Calibration 07

X431 Pros Mini 958 2 Porsche Gts The Steering Angle Calibration 08

X431 Pros Mini 958 2 Porsche Gts The Steering Angle Calibration 09

X431 Pros Mini 958 2 Porsche Gts The Steering Angle Calibration 10


Okay, have everything swapped to the new wheel, new wheel is installed, battery back on, cleared faults and performed steering angle sensor adaptation (using x431 pros mini), all is good and back to normal.
The clockspring and switch setup I bought is from a 2017 Cayenne. I have a 2016. 2017 has the PCM4.0 and a newer instrument cluster display with more pixels and different menus. So my diamond button worked, but neither telephone buttons or the back button worked at all, and now my right scroll wheel controlled volume and left scroll wheel controlled up and down cluster screens, but neither would click.
I got that recoded, there are two different communication protocols, I swapped it and all buttons are working properly again.

The steering wheel control module plugs into the clockspring assembly, and then the main car harness plugs into the clockspring. So it applied changes that the donor car the switch setup came out of, changed the communication protocol and it also coded the control module to have the heated wheel active. But it doesn’t work.
The voice control button works, but on the radio screen it says function not active. This is making me wonder, I believe the steering wheel control module has to be both coded and an activated for it to work.
I am going to keep working on this and get back to everyone.


Date: 10-16-2020

In summary of what has been done/needed so far…

-Heated steering wheel
-Heated wheel switch if you don’t get a complete wheel
-Clockspring with heated wheel power and ground pins (I used a complete clockspring and stalk assembly from a used car)
-PIWIS or Launch Computer to clear codes and recalibrate steering angle sensor, make sure steering wheel and instrument cluster are coded for the wheel and most importantly to input the activation code for heated wheel. (Activation code can only be obtained off the grey market porsche-code.com )

Everything I have touched is working like normal, no changes to any buttons or stalks, car is totally normal at this point but the wheel doesn’t work yet.

It looks like a new uncoded steering wheel control module is needed in my case. My factory module will accept the coding but won’t allow the wheel to work, and does not recognize when the heated wheel button is pressed. Another member ran into the same issue, everything coded and activated but a no go, replaced the module with a new one, didn’t even have to code anything and it instantly worked. So I am hopefully that will work in my case as well.


…………………. Not ending ………………..


My great appreciation to @ volcanogts who record all what he tested.


Okay, as you read above, you know @volcanogts has not completely solved his problem. If you know the solution, you can go to the forum to help him; if you are also interested in Launch x431 pros mini, you can visit www.obdii365.com

Original article:http://blog.obdii365.com/2020/10/23/x431-pros-mini-958-2-porsche-gts-steering-angle-calibration-confirmed/